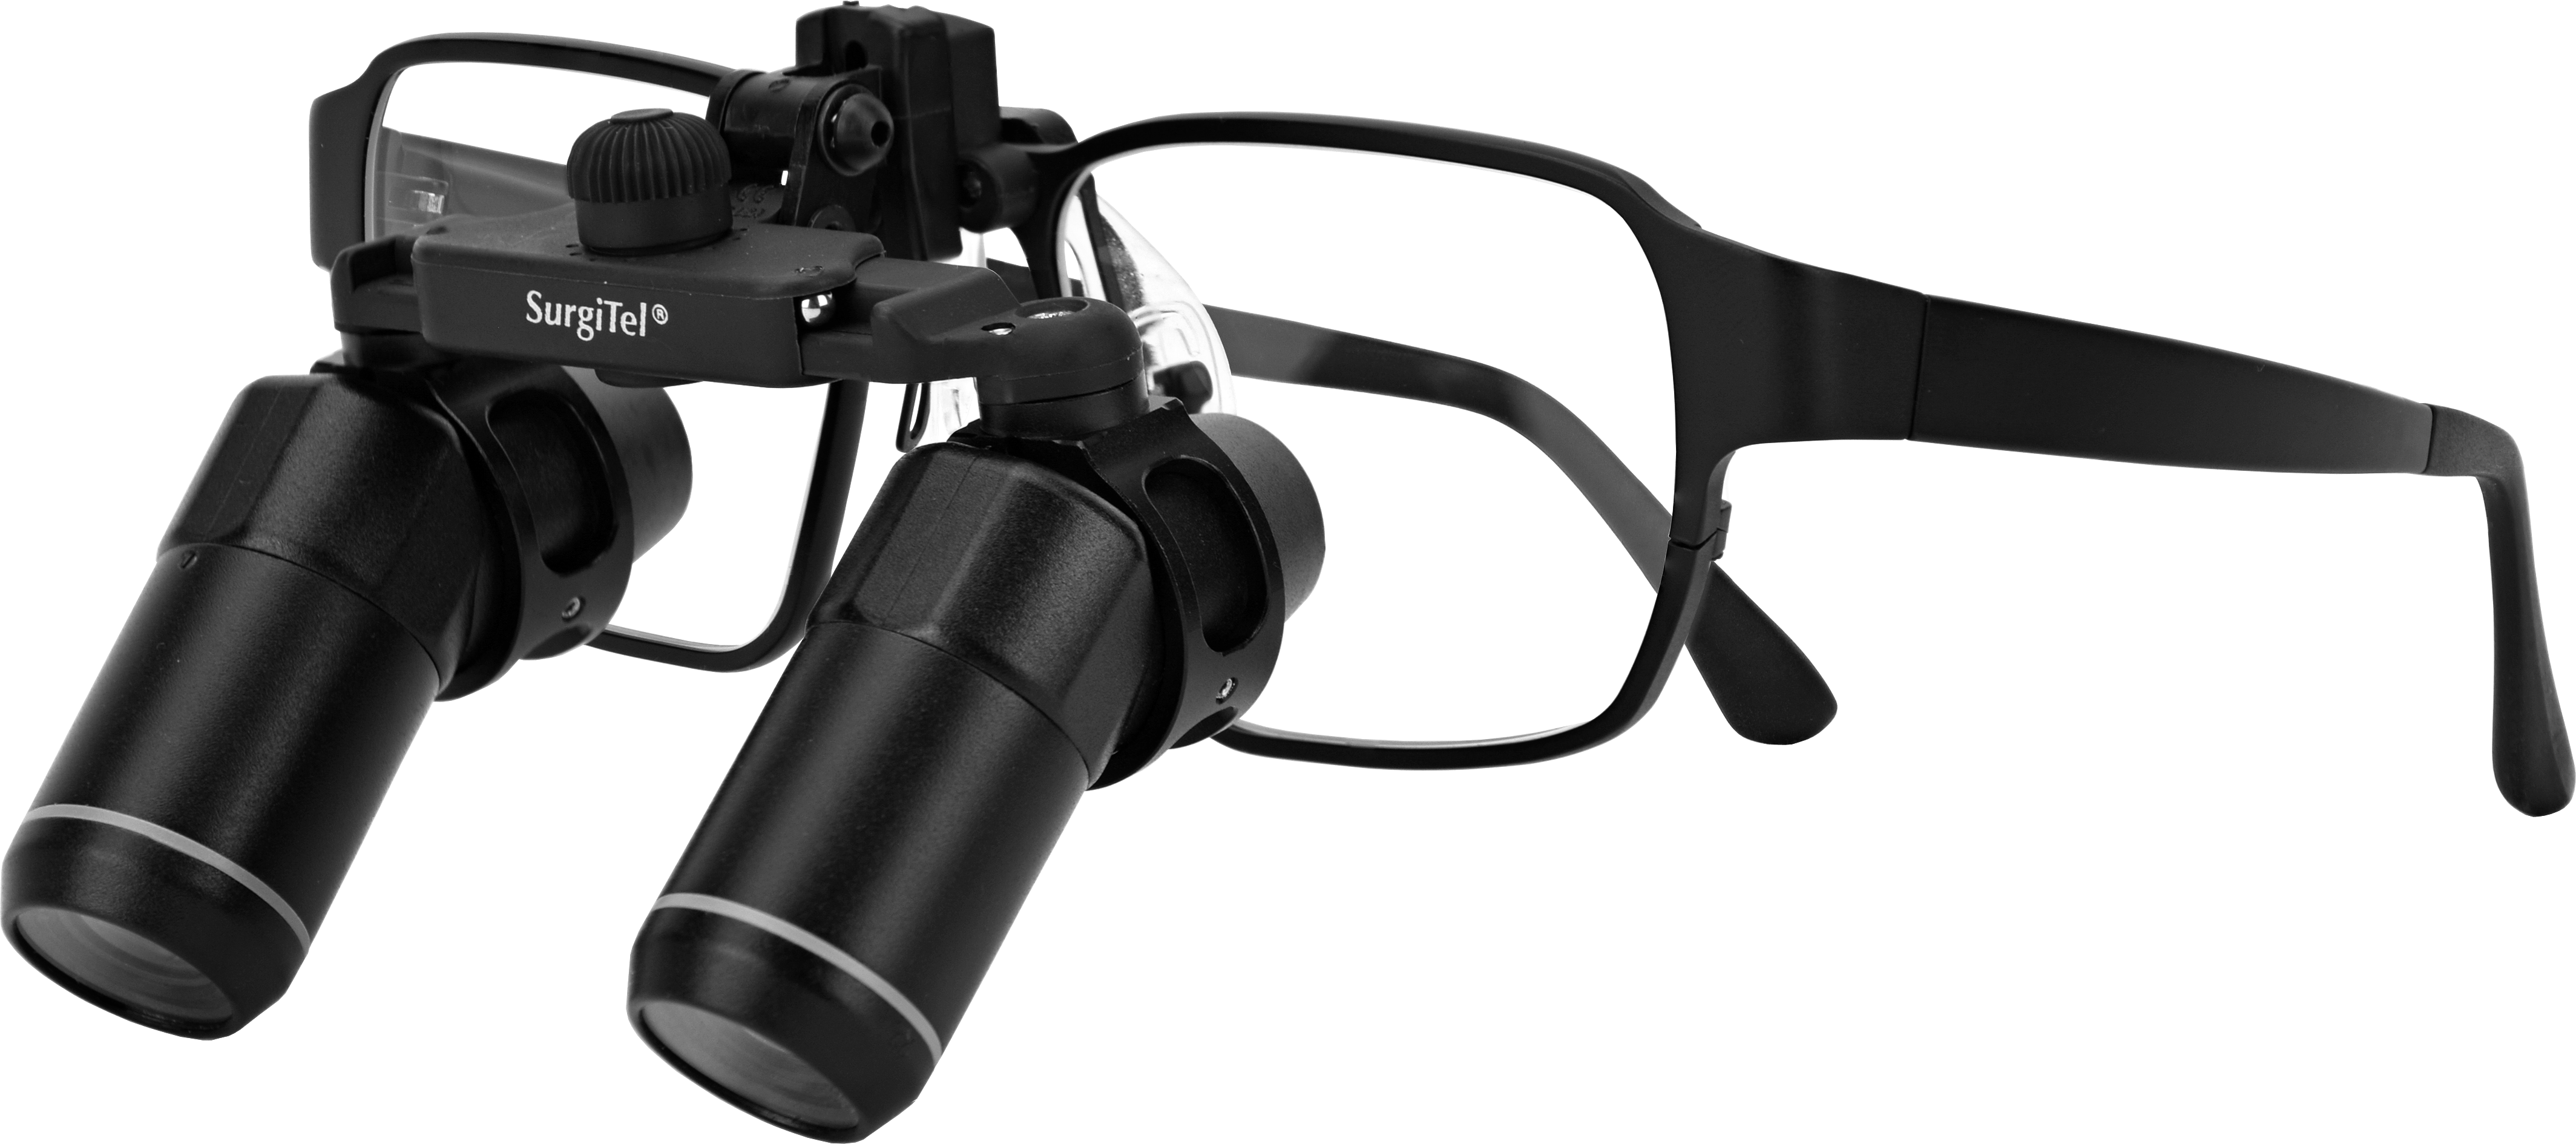
 Thank you for choosing the ErgoDeflection FLM loupes. Designed to meet the demanding needs of today’s clinical professionals, these loupes will enable you to see, work, and feel your best.
User Manual (IFU)
Quick Start Guide
Getting Started

Example of preferred pupillary adjustment.
Remove the protection caps and adjust the nose pads for a secure fit. If you are experiencing fogging, slightly move the frames away from your face and eyes. To maximize the field size, position the oculars against the frame lenses.
All SurgiTel loupes are shipped out set to the users specifications. If minor adjustments are needed due to a change in preference(s), follow the steps below.
- Adjust the pupillary distance knob until the two images converge together into a “binocular” view.
- Adjust the hinge tension to a comfortable setting, adding slightly more tension if using a clip-on light. The hinge tension can be fine-tuned using the bottom tension screw on the hinge.
Adjusting Nose Pad(s)
When the nose pads are properly adjusted to your face, they will provide excellent comfort and balance. If the nose pads do not make even contact with your nose comfortably, please follow the directions described below.
How to Adjust Nose Pad to Fit Nose
Adjusting Nose Pads for Too High Oculars
Adjusting the width of the nose pads by bending the nose pad wire mounts outwards (see Figure 1). By doing so, this will reduce the height of the frame and lower the ocular position.
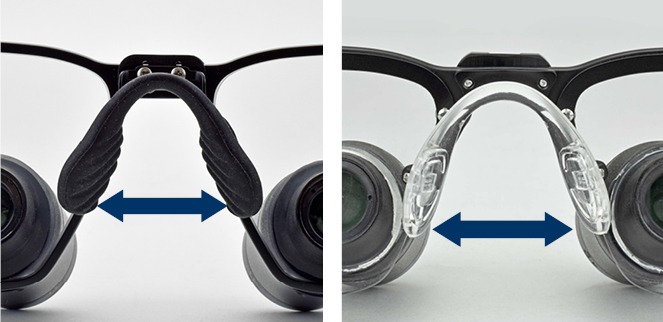
Figure 1
Adjusting Nose Pads for Too Low Oculars
Adjust the width of the nose pads by bending the nose pad wire mounts inwards (see Figure 2). By doing so, this will increase the height of the frame and raise the ocular position.
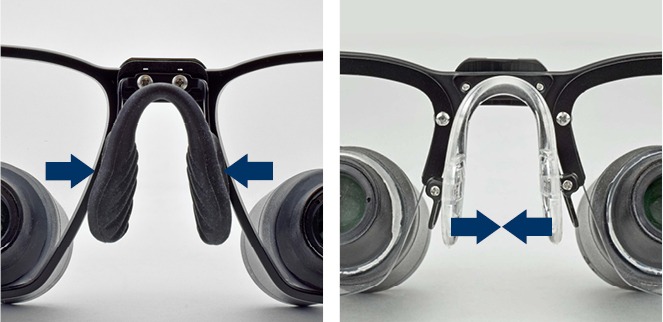
Figure 2
Adjusting Nose Pads for Low Nose
If the nose pads are not evenly placed on the bridge of the nose, bend the wire mounts down and away from the frame (see Figure 3) and readjust the width of the nose pads if necessary. Note that the wire mount tilt angle depends on the bridge of the nose. The less nose bridge you have, the larger the tilt becomes to fit your nose.
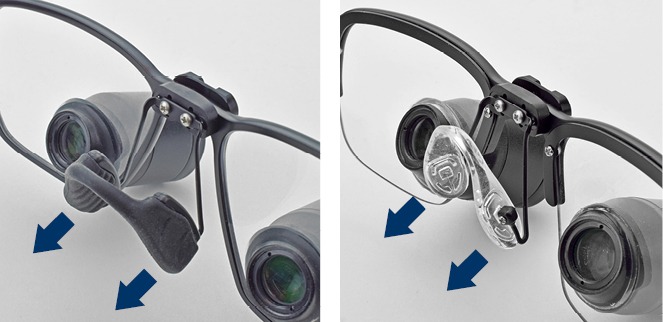
Figure 3
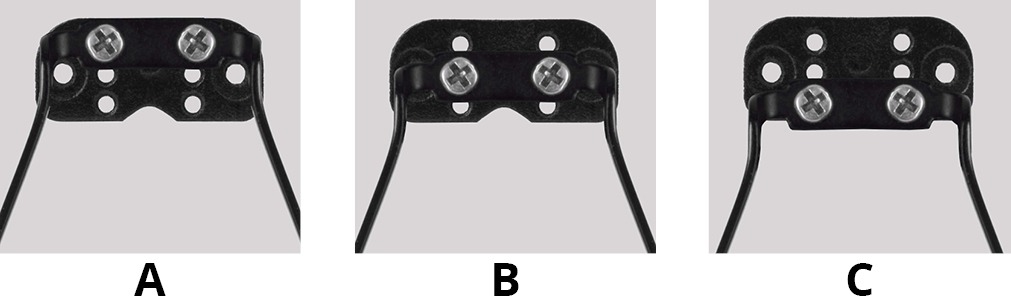
Changing Nose Pad Style, Using Ergo Fit Nose Pad Mounting Block
- Before switching to a different nose pad style, it is recommended that you try the set choice from our engineers. If you are experiencing any slight ocular misalignment or discomfort, refer to “How to Adjust Nose Pad to Fit Nose” instructions. If you decide to change to a different nose pad style, please read and follow the steps below for help with the vertical alignment of the oculars.
- Start by reassembling the new nose pad wire arms into the same mounting block holes, as used on previous.
- If you see top shadowing when looking through the oculars, mount the nose pad wire arms down (example: “A to B” or “B to C”) until fixed.
- If you see bottom shadowing when looking through the oculars, mount the nose pad wire arms up (example: “C to B” or “B to A”) until fixed.
Settings and Adjustments
-
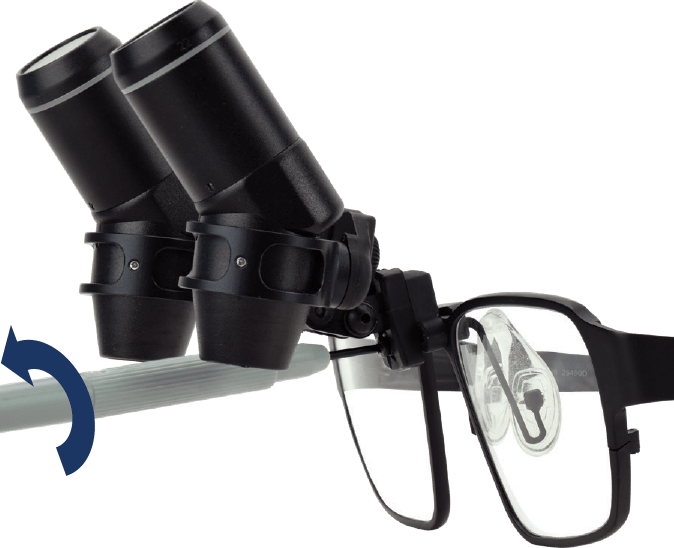
Figure 4
Loosen the slide retainer screw that allows you to adjust the Vertical Position (V.P.). (See Figure 4)
- Place the loupes at the lowest position on the frame, then slowly raise upward until you achieve a comfortable ocular height. To set the V.P., make sure the slide retainer screw is tightened. (See Figure 4)
- Adjust the declination angle by moving the ocular rack until your preferred head tilt is achieved. Please note that the safe head tilt range is less than 20-degrees. Then adjust the ocular rack to attain your line of sight. (See Figure 11 in “Adjusting Flip-Up Tension and Declination Angle)
- Tighten all hinge screws with a hex key (to add slight tension) once you have found your comfortable declination angle and alignment.
-
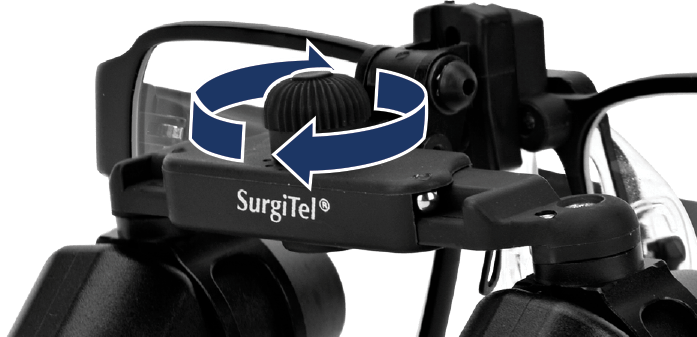
Figure 5
Position yourself into your working position and adjust the pupillary distance (P.D.) knob (see Figure 5) until you have one image in an oblong/oval shape. (See Figure 6)
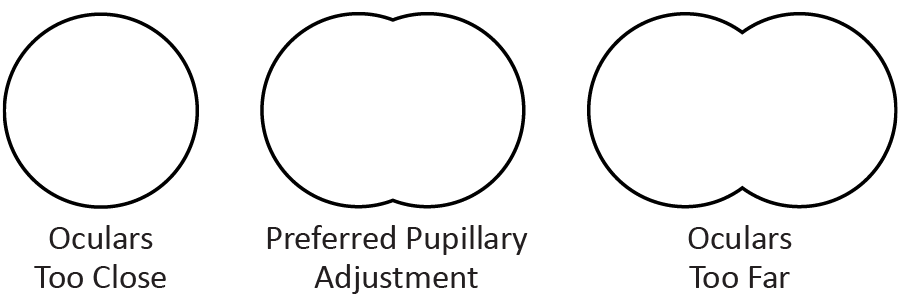
Figure 6
Adjusting Vertical Position (V.P.)

Figure 7
If you are experiencing top or bottom shadowing (see Figure 7) follow the steps below to remedy the issue.
- Loosen the slide retainer screw that allows the slide retainer to move up or down. (See Figure 4 in “Settings and Adjustments”)
- Position the loupes on your face/nose.
- Adjust the oculars until oculars are aligned to the eyes.
- If the oculars are not properly aligned, remove the loupes from your face to make adjustments. Remove the slide retainer screw and reposition the oculars as needed. For guidance on screw placement, refer to Figure 8.
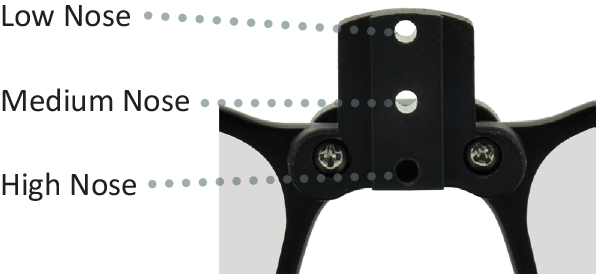
Figure 8
Note: If you are experiencing top shadowing, the oculars are too low. Raise the oculars using the slide retainer until the shadowing is remedied.
If you are experiencing bottom shadowing, the oculars are too high. Lower the oculars using the slide retainer until the shadowing is remedied.
Adjusting Pupillary Distance (P.D.)

Figure 9
Pupillary distance (P.D.) will be set to your measured specifications. If you are experiencing left or right shadowing (see Figure 9), adjust the settings as needed.
- Position the loupes on your face and nose.
- Using the P.D. knob (see Figure 5), spread the oculars apart to the widest distance.
- When looking through the oculars, focus on an object in front of you (such as your thumb). If it is not in focus, move the object towards or away from you until you see it clearly.
- With the other hand, slowly adjust the P.D. knob until you have one image in an oblong/oval shape. (See Figure 6)
Note: If you are experiencing shadowing on the outside of your field of view, your P.D. is too narrow. Widen the P.D. using the P.D. knob until the shadowing is remedied.
If you are experiencing shadowing on the inside of your field of view, your P.D. is too wide. Use the P.D. knob to narrow the distance of the oculars until the shadowing is remedied.
If you are still experiencing inside or outside shadowing after adjusting for pupillary distance, please contact Customer Service for assistance by calling 1-800-959-0153 or emailing support@surgitel.com.
Adjusting Flip-Up Tension and Declination Angle
Figure 10
The top locking screw controls the flip-up tension. The entire loupe system can be flipped up to open your line of sight by simply rotating the link hinge upwards (see Figure 10). If you frequently flip up your loupes, keep this screw slightly loose for easier adjustment.
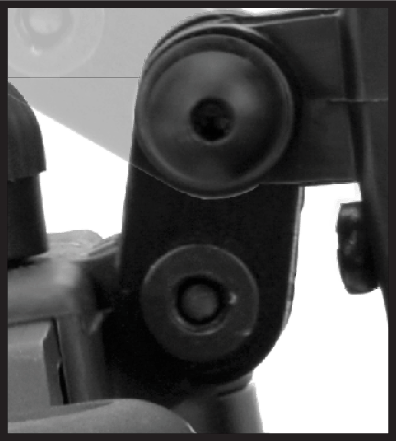
Closeup of top and bottom hinge screws
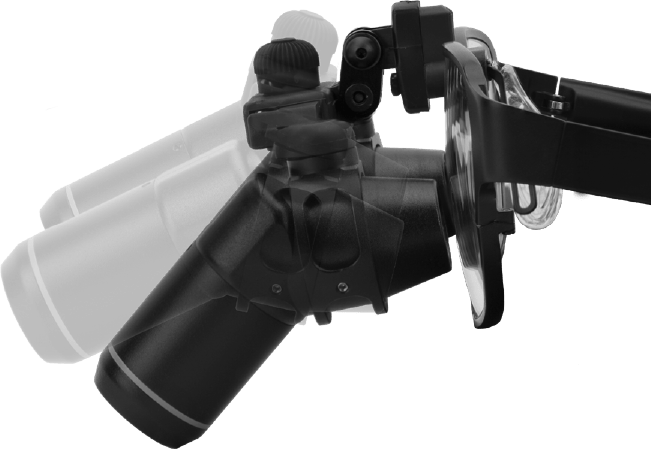
Figure 11
The bottom locking screw controls the declination angle. This screw allows for adjustment and locking of the declination angle (see Figure 11), as well as maintaining the angle whether the loupes are flipped up or down. If you use your loupes in different working postures, it is advisable to leave this screw slightly loose for easy adjustments.
A tip to have a wide field of view is to bring the ocular close to your eyes, ideally having the oculars touching the lens.
Note: The top and bottom screws are used for locking purposes.
Cleaning and Disinfection
Your loupe is a precision optical instrument made from high-quality materials. To ensure its longevity and optimal performance, please follow these instructions for proper cleaning and disinfecting. Noncompliant cleaning and disinfecting methods may result in damage to the loupes and may result in a void warranty.
Cleaning
To clean your loupes, we advise using either eyeglass cleaner (without alcohol) or applying mild soap and water with a soft cloth until particles are loosened. Wipe with a dry microfiber cloth or air dry.
DO NOT USE
- Any cleaners containing alcohol, hydrogen peroxide, ethanol, ammonia, glutaraldehyde, or iodophor.
Disinfecting
To disinfect your loupes, we advise using quaternary ammonium compounds and ensuring they are dried thoroughly.
Recommended Disinfectants
The following specific cleaners have been tested and are approved for the disinfection of SurgiTel loupes:
- To be determined
DO NOT
- Use any other versions of disinfecting wipes than those mentioned above
- Rinse under running water
- Submerge in water or any liquid
- Use an autoclave
Professional Loupe Tune Up with Detailed Cleaning
To keep your loupes working like new, we recommend that they should be sent in for a tune up at least once a year. This will ensure that your loupes are kept in great condition. To learn more about the U.S. and Canada Tune Up Program, visit www.surgitel.com/loupe-tune-up.

