
Replacing an LED and Cable
These instructions show how to move the optics and adapter from your current LED light to the replacement cable enclosed.
DO NOT TEST LED WITHOUT REPLACING OPTICS
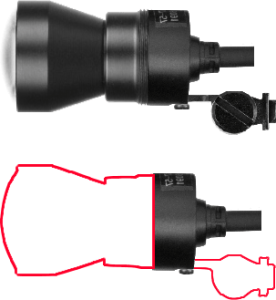
Replacing a LED Cable
Moving Optics from Current LED to Replacement Cable
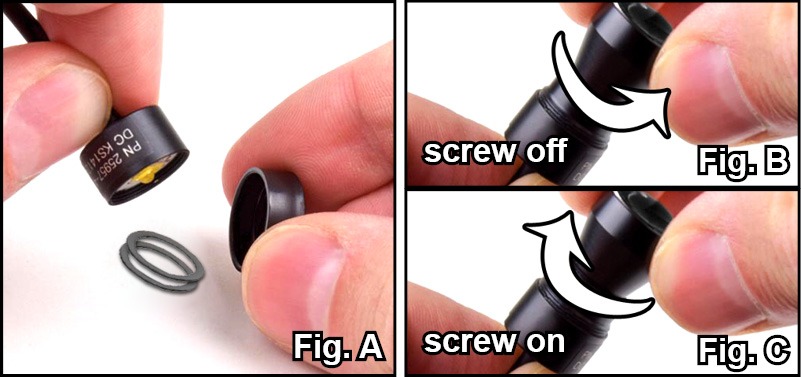
- Remove the protective cap from your enclosed cable replacement and remove the two spacers inside (Figure A).
- Unscrew the optics from your damaged LED cable (Figure B).
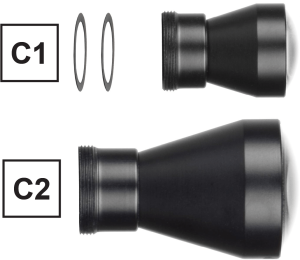
- If you have a Micro LED light (Figure E, C1), place the provided spacers inside of your replacement LED cable housing, being careful not to touch the LED bulb. If you have a Mini LED light (Figure E, C2), skip this step and dispose of the spacers. See Figure E: Assembly Variation to see both optics types.
- Screw the optics from your current light onto your replacement cable (Figure C).
Connecting LED to Loupes
- Detach your light adapter from your damaged cable (discard the previously used screw and washer) and attach it to your new cable using the provided screw and washer.
a. If your current adapter position is “horizontal” (Figure E, A1, and B1), no adjustment is needed.
b. If your current adapter position is a “right angle” (Figure E, A2, and B2) adjust your adapter to be flat (Figure D) before attaching to your new cable.
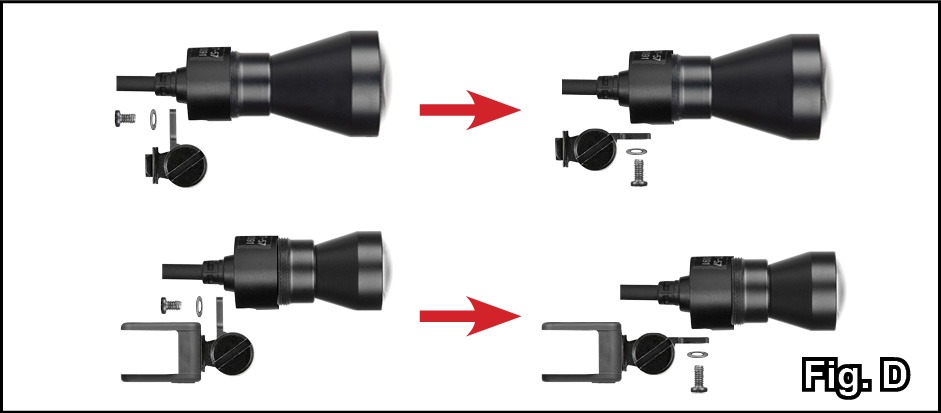
Figure E: Assembly Variations
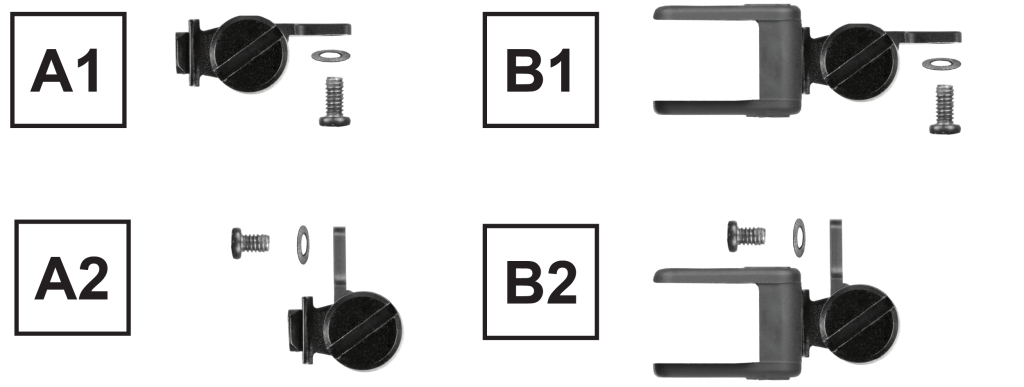
A1. Dove Tail Adapter (side mount)
A2. Dove Tail Adapter (back mount)
B1. Clip Adapter (side mount)
B2. Clip Adapter (back mount)
C1. Photo of Micro LED Light optics (includes spacers)
C2. Photo of Mini LED Light optics
A2. Dove Tail Adapter (back mount)
B1. Clip Adapter (side mount)
B2. Clip Adapter (back mount)
C1. Photo of Micro LED Light optics (includes spacers)
C2. Photo of Mini LED Light optics