

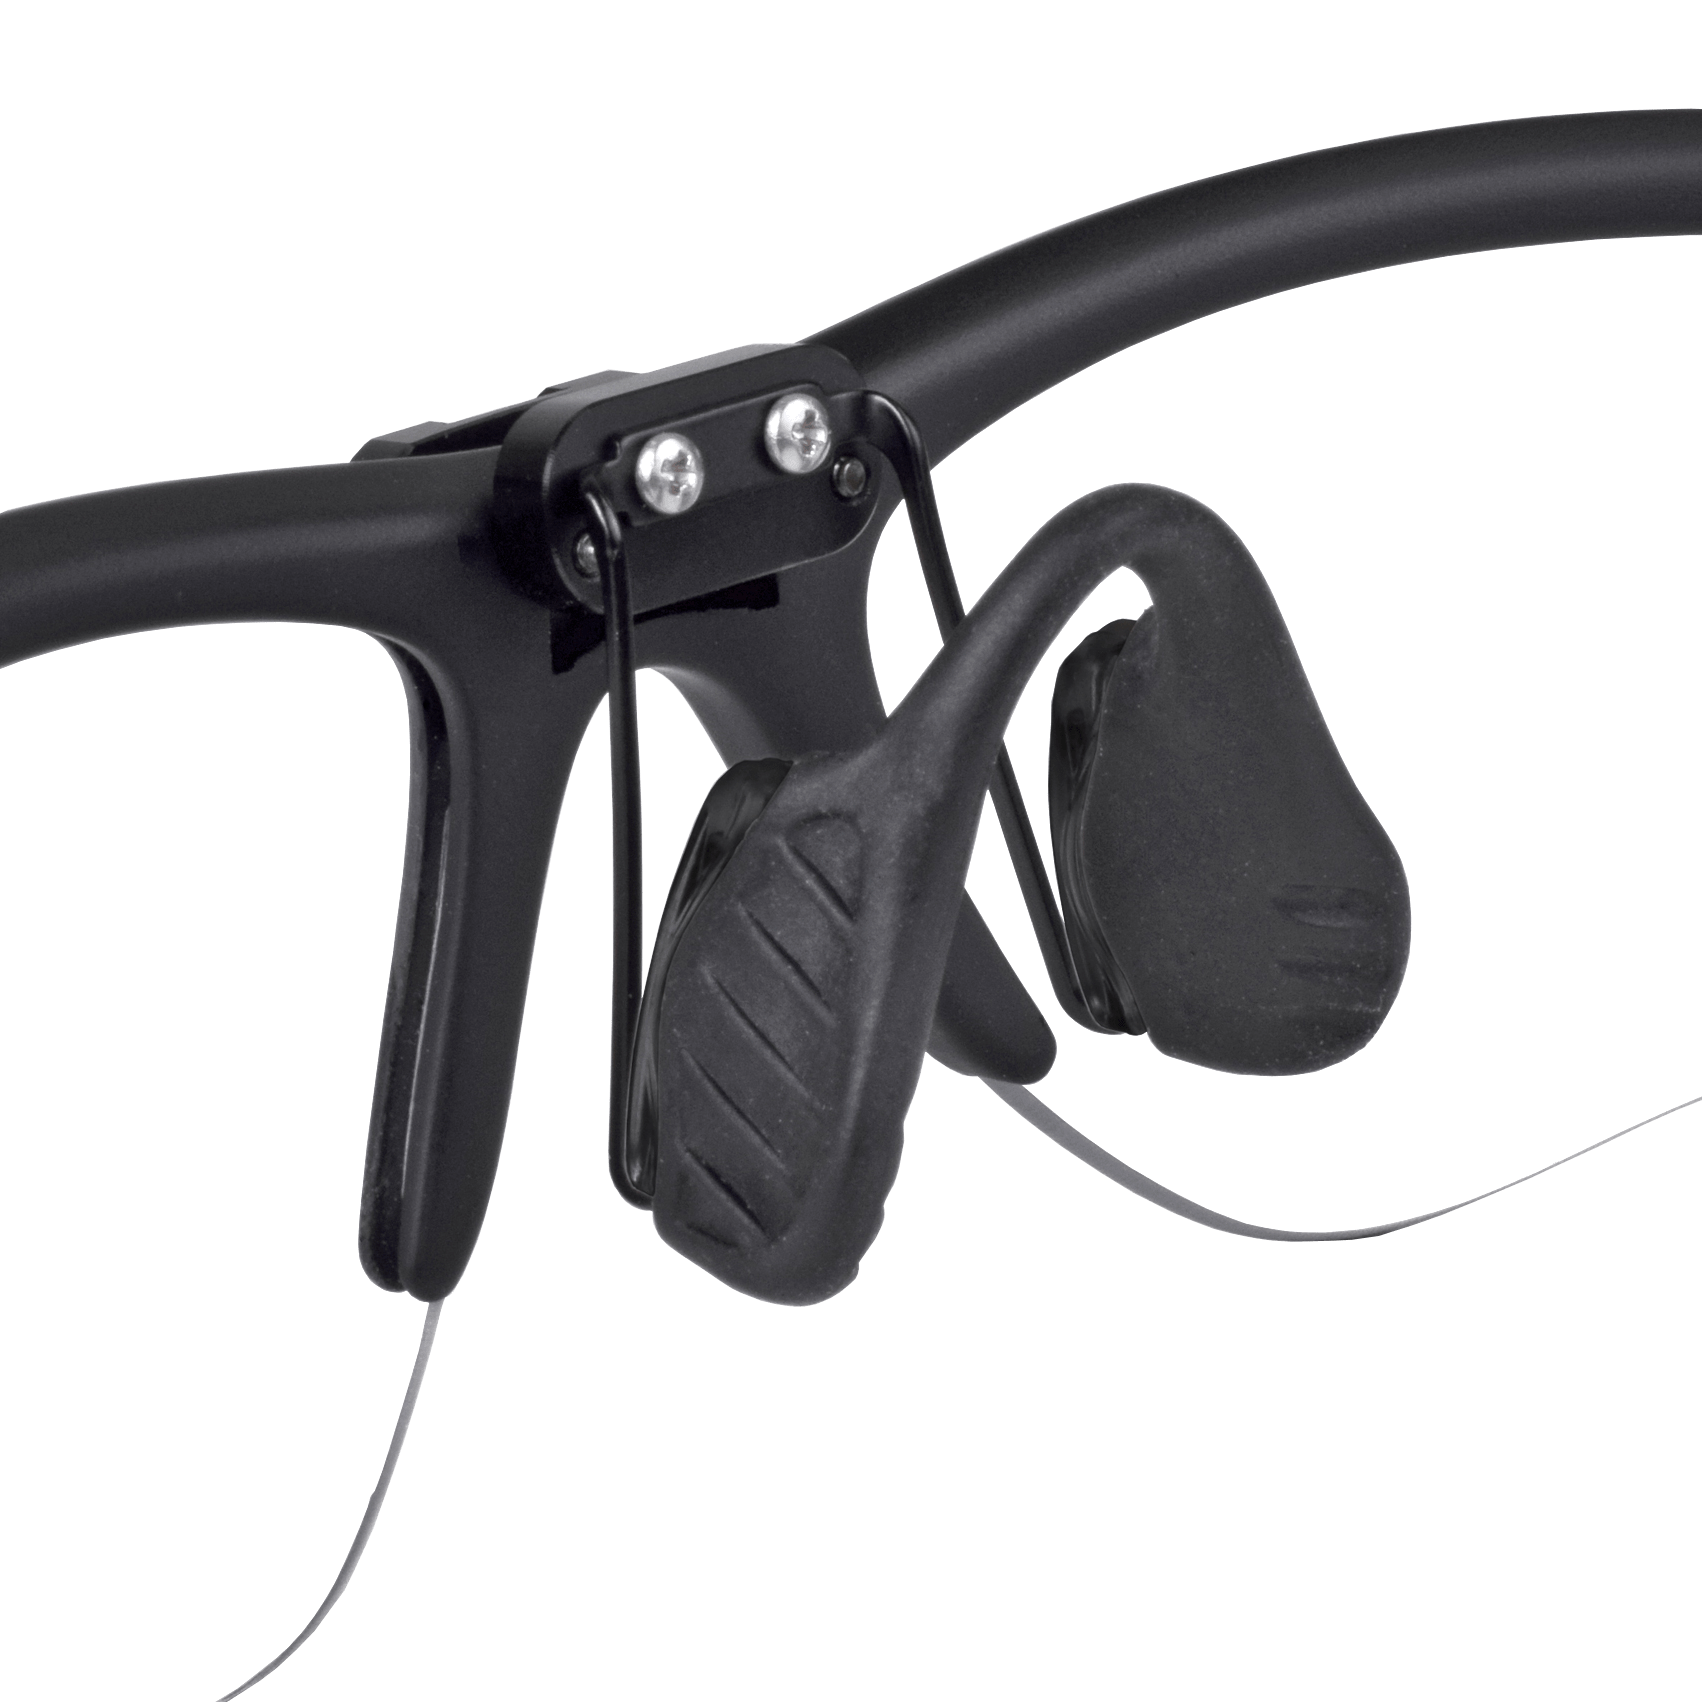
Correcting Shadowing and Comfort Issues by Adjusting Nose Pads
Nose pads are set by the factory at a suitable position based on data collected from the buyer. If encountering visual issues, like shadowing, nose pads are adjustable to raise and lower the height of oculars on nose. Comfort and improved visibility, the nose pad wire arms can be bent to bring oculars closer or further away from eyes.
Visual Issues
That Require Customer Service
If you are experiencing any of the visual issues listed below, please contact your local rep or customer service for help, if not, proceed to Step One.
- Working Distance is too long or short
- Coaxial image misalignment (Figure 1)
- Double vision (Figure 2)
- Dip divergence (Figure 3)
- Shadowing on the inside edge (Figure 4)
- Shadowing on the outside edge (Figure 5)
- Shadowing on both oculars left/right shadows (Figure 6)
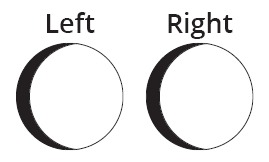
Coaxial Image Misalignment (Figure 1)
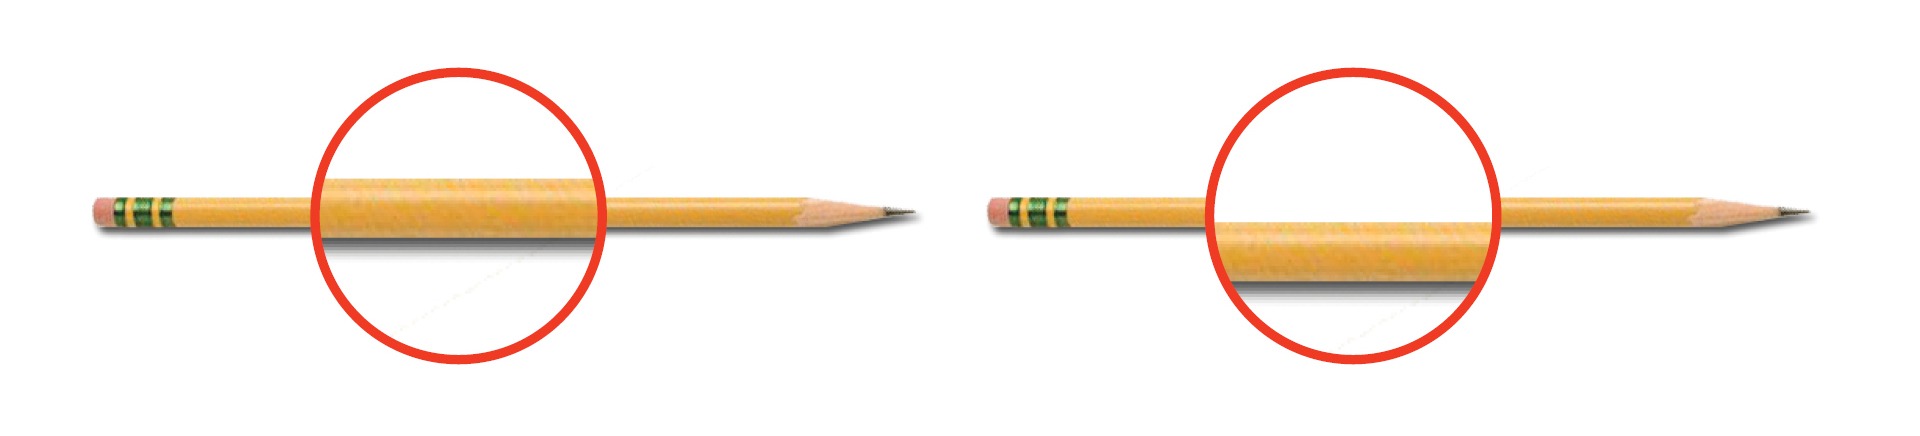
Left: Coaxial Image | Right: Non-coaxial Image
The pencil test is a diagnostic tool to evaluate if your loupes need to be shipped in to be recalibrated.
Double Vision (Figure 2)
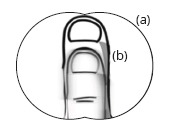
Example of the field being too separated
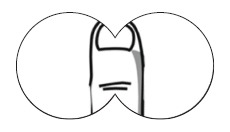
Example of the ideal field (a) but vertical double images (b)
Dip Divergence (Figure 3)


Shadowing on Inside (Figure 4)

Example of shadowing on inside.
Shadowing on Outside (Figure 5)
Example of shadowing on outside.
Shadowing on Both Oculars Left/Right Shadows (Figure 6)
Example of shadowing on the left side of both oculars.
Example of shadowing on the right side of both oculars.
Visual Issues
That Require Customer Service
If you are experiencing any of the visual issues listed below, please contact your local rep or customer service for help, if not, proceed to Step One.
- Working Distance is too long or short
- Coaxial image misalignment (Figure 1)
- Double vision (Figure 2)
- Dip Divergence (Figure 3)
- Shadowing on the inside edge (Figure 4)
- Shadowing on the outside edge (Figure 5)
- Shadowing on both oculars left/right shadows (Figure 6)
Coaxial Image Misalignment (Figure 1)
Left: Coaxial Image | Right: Non-coaxial Image
The pencil test is a diagnostic tool to evaluate if your loupes need to be shipped in to be recalibrated.
Double Vision (Figure 2)
Example of the field being too separated
Example of the ideal field (a) but vertical double images (b)
Dip Divergence (Figure 3)
Shadowing on Inside (Figure 4)
Example of shadowing on inside.
Shadowing on Outside (Figure 5)
Example of shadowing on outside.
Shadowing on Both Oculars Left/Right Shadows (Figure 6)
Example of shadowing on the left side of both oculars.
Example of shadowing on the right side of both oculars.
Visual Issues
That Require Customer Service
If you are experiencing any of the visual issues listed below, please contact your local rep or customer service for help, if not, proceed to Step One.
- Working Distance is too long or short
- Coaxial image misalignment (Figure 1)
- Double vision (Figure 2)
- Dip Divergence (Figure 3)
- Shadowing on the inside edge (Figure 4)
- Shadowing on the outside edge (Figure 5)
- Shadowing on both oculars left/right shadows (Figure 6)
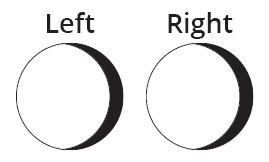
Coaxial Image Misalignment (Figure 1)

Top: Coaxial Image
Bottom: Non-coaxial Image
The pencil test is a diagnostic tool to evaluate if your loupes need to be shipped in to be recalibrated.
Double Vision (Figure 2)
Example of the field being too separated
Example of the ideal field (a) but vertical double images (b)
Dip Divergence (Figure 3)
Shadowing on Inside (Figure 4)
Example of shadowing on inside.
Shadowing on Outside (Figure 5)
Example of shadowing on outside.
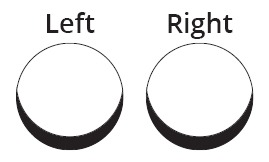
Shadowing on Both Oculars
Left/Right Shadows (Figure 6)
Example of shadowing on the left side of both oculars.
Example of shadowing on the right side of both oculars.
STEP ONE
Correcting Shadowing
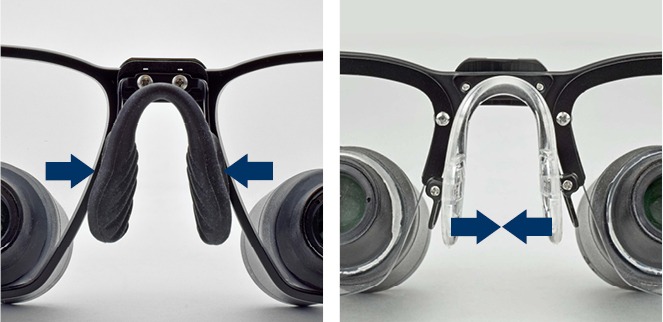
Look through your loupes and see if there is top or bottom shadowing. If so, there are three ways you can adjust the nose pad to your face:
- Nose Pad Type
- Wire Options
- Mounting block
If you are not experiencing top or bottom shadowing, please continue to Step Two.
Shadowing on Top (Oculars are too Low)
Minimal Shadowing
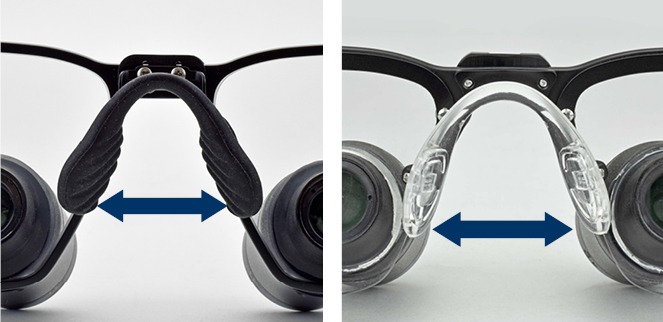
Correct by adjusting the width of the nose pad(s) by bending the nose pad wire mounts inwards.

Large Shadowing
If bending the nose pad wires did not work, try lowering the mounting position of the wire arms (example: “A to B” or “B to C”) until fixed.
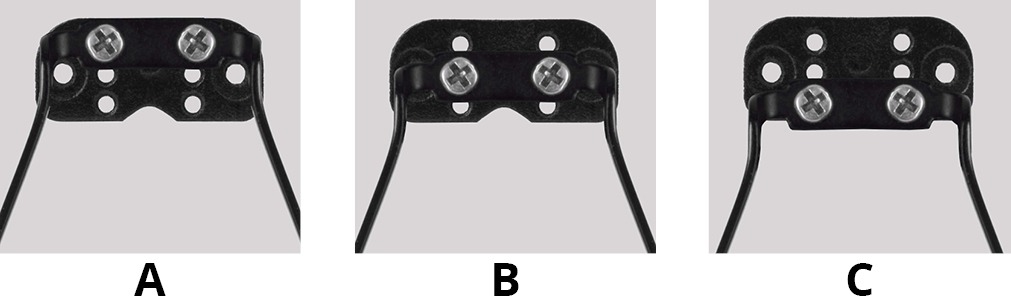
Shadowing on Bottom (Oculars are too High)
Minimal Shadowing
Correct by adjusting the width of the nose pad(s) by bending the nose pad wire mounts outwards.
Large Shadowing
If bending the nose pad wires did not work, try raising the mounting position of the wire arms (example: “C to B” or “B to A”) until fixed.
STEP ONE
Correcting Shadowing
Look through your loupes and see if there is top or bottom shadowing. If so, there are three ways you can adjust the nose pad to your face:
- Nose Pad Type
- Wire Options
- Mounting block
If you are not experiencing top or bottom shadowing, please continue to Step Two.
Shadowing on Top (Oculars are too Low)
Minimal Shadowing
Correct by adjusting the width of the nose pad(s) by bending the nose pad wire mounts inwards.
Large Shadowing
If bending the nose pad wires did not work, try lowering the mounting position of the wire arms (example: “A to B” or “B to C”) until fixed.
Shadowing on Bottom (Oculars are too High)
Minimal Shadowing
Correct by adjusting the width of the nose pad(s) by bending the nose pad wire mounts outwards.
Large Shadowing
If bending the nose pad wires did not work, try raising the mounting position of the wire arms (example: “C to B” or “B to A”) until fixed.
STEP ONE
Correcting Shadowing
Look through your loupes and see if there is top or bottom shadowing. If so, there are three ways you can adjust the nose pad to your face:
- Nose Pad Type
- Wire Options
- Mounting block
If you are not experiencing top or bottom shadowing, please continue to Step Two.
Shadowing on Top
(Oculars are too Low)
Minimal Shadowing
Correct by adjusting the width of the nose pad(s) by bending the nose pad wire mounts inwards.
Large Shadowing
If bending the nose pad wires did not work, try lowering the mounting position of the wire arms (example: “A to B” or “B to C”) until fixed.
Shadowing on Bottom
(Oculars are too High)
Minimal Shadowing
Correct by adjusting the width of the nose pad(s) by bending the nose pad wire mounts outwards.
Large Shadowing
If bending the nose pad wires did not work, try raising the mounting position of the wire arms (example: “C to B” or “B to A”) until fixed.
STEP TWO
Adjusting for Comfort
High Noses
For individuals with high nose bridges, it is recommended to try the wire arms straight before bending.
If not to your liking try bending the wire mounts up and towards the frame and readjust the width of the nose pads if necessary. Note that the wire mount tilt angle depends on the bridge of the nose. The more nose bridge you have, the smaller the tilt becomes to fit your nose.
If it is pulled outwards and shadowing occurs, repeat Step One.

Low Noses
For individuals with low nose bridges, bend the wire mounts down and away from the frame and readjust the width of the nose pads if necessary.
The wire mount tilt angle depends on the bridge of the nose. The less nose bridge you have, the larger the tilt becomes to fit your nose.
If shadowing does occur, repeat Step One.
Note: Pulling the nose pad away from the frame helps to eliminate fogging.

STEP TWO
Adjusting for Comfort
High Noses
For individuals with high nose bridges, it is recommended to try the wire arms straight before bending.
If not to your liking try bending the wire mounts up and towards the frame and readjust the width of the nose pads if necessary. Note that the wire mount tilt angle depends on the bridge of the nose. The more nose bridge you have, the smaller the tilt becomes to fit your nose.
If it is pulled outwards and shadowing occurs, repeat Step One.
Low Noses
For individuals with low nose bridges, bend the wire mounts down and away from the frame and readjust the width of the nose pads if necessary.
The wire mount tilt angle depends on the bridge of the nose. The less nose bridge you have, the larger the tilt becomes to fit your nose.
If shadowing does occur, repeat Step One.
Note: Pulling the nose pad away from the frame helps to eliminate fogging.
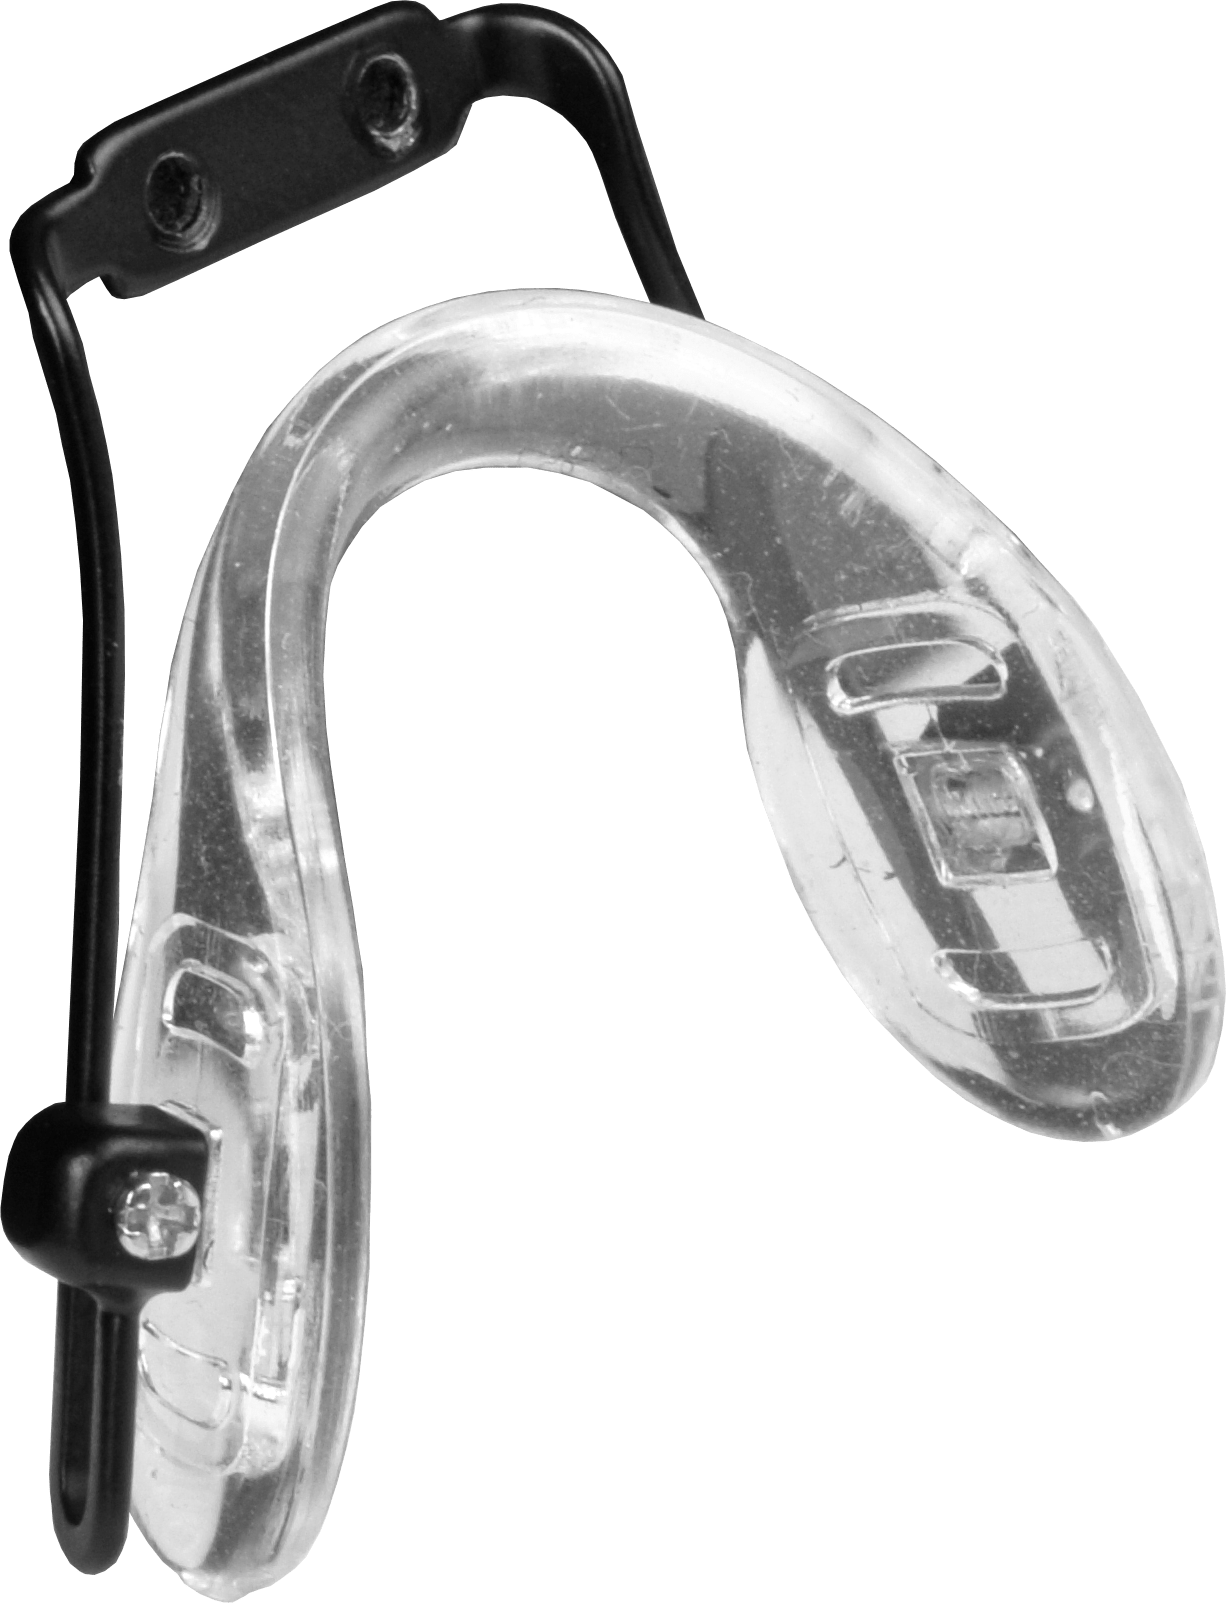
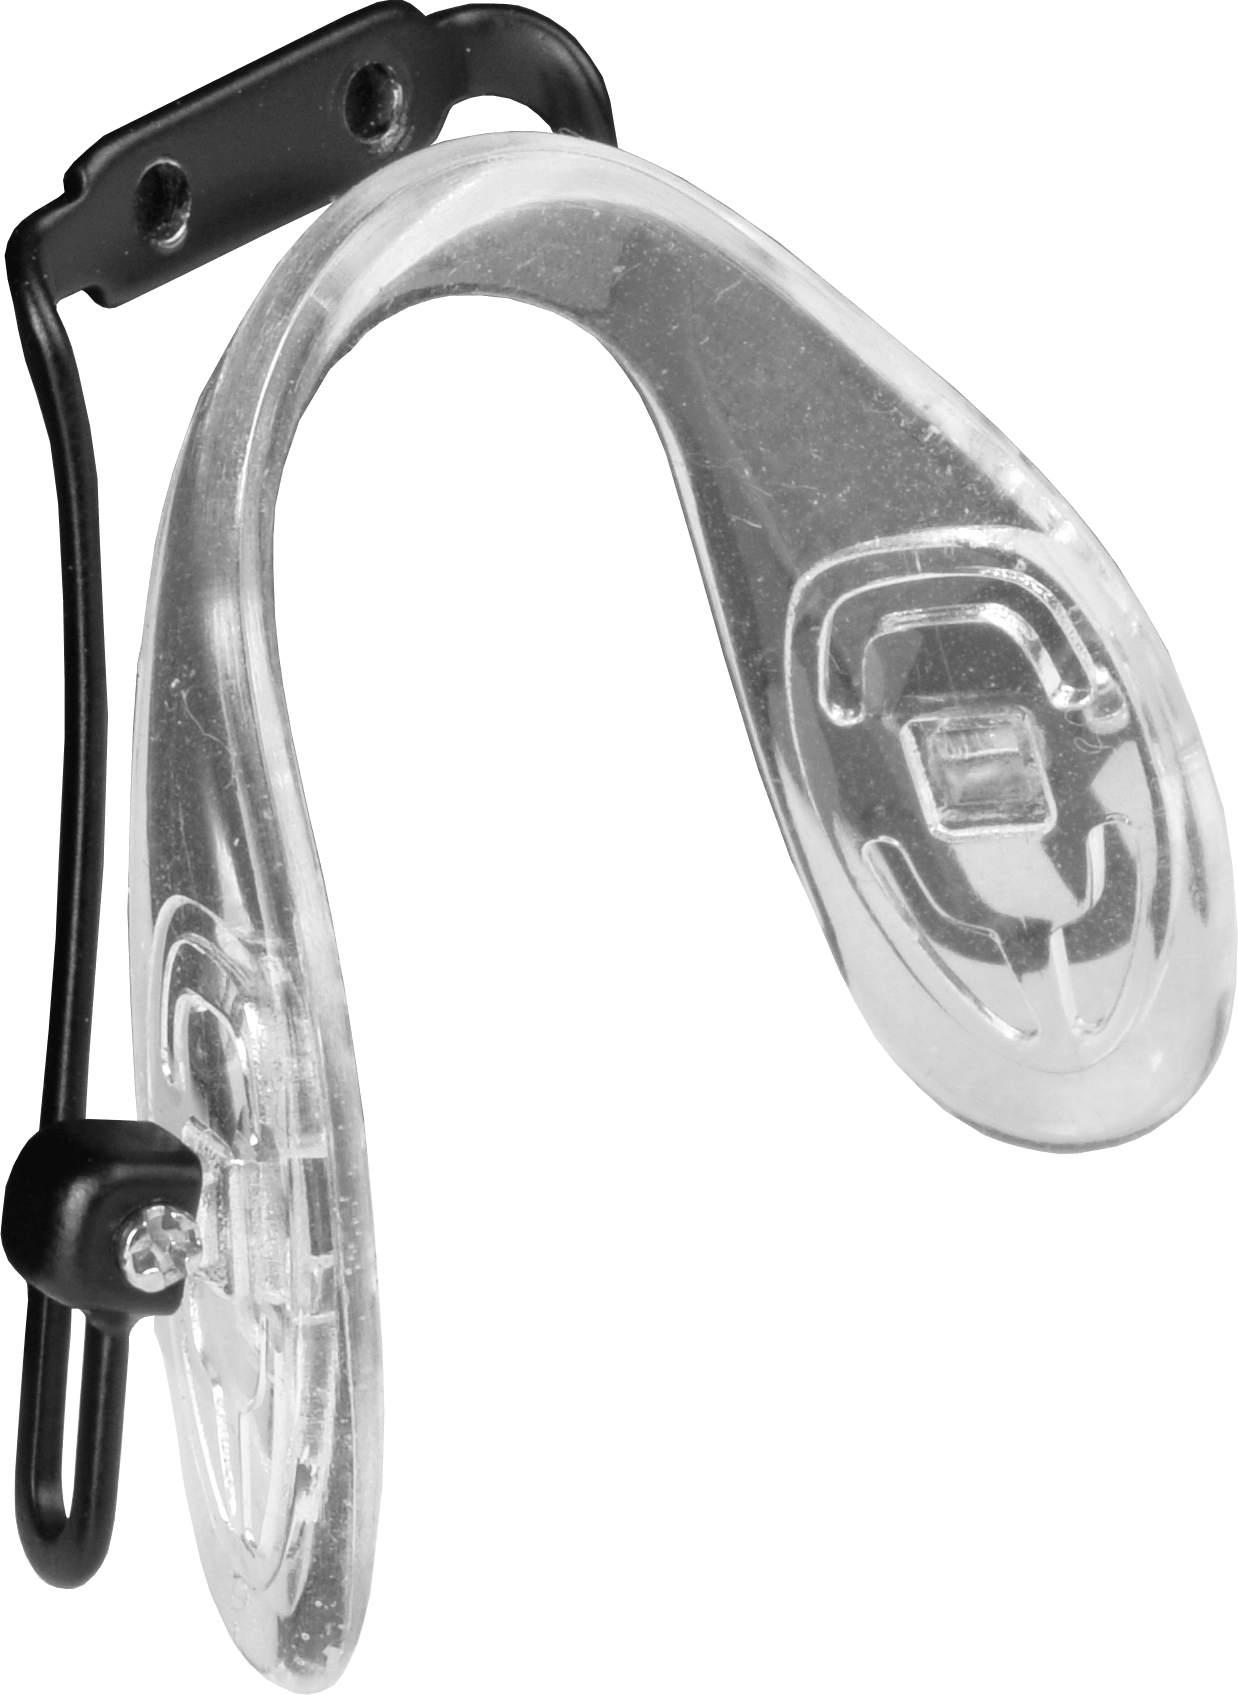
Other Nose Pad Styles
Options
Small String
(Ideal for Low Noses)
Large String
(Ideal for High Noses)
SurgiTel Rubber Pad
If you switch your nose pad and notice shadowing, refer to the instructions below before revisiting Step One.
- If you see top shadowing when looking through the oculars, mount the nose pad wire arms down (example: “A to B” or “B to C”) until fixed.
- If you see bottom shadowing when looking through the oculars, mount the nose pad wire arms up (example: “C to B” or “B to A”) until fixed.
Support Videos
Click Your Frame Type
Aero/Ergo Max Frame Adjustments
Click tabs to view videos

